- Loading...
Tools are a big part of being a productive developer on OpenJFX and we aim to provide excellent support for all three major IDEs: NetBeans, IntelliJ IDEA, and Eclipse. Regardless of which development environment you prefer, you should find it easy to get up and running with OpenJFX. We hope you will return the favor by submitting patches and bug reports!
This section assumes that you have already succeeded in Building OpenJFX. A gradle build must complete before IDE support will fully work (otherwise your IDE will just be a glorified text editor with lots of red squiggles!). Specific instructions for using each IDE is provided below, followed by a discussion on Developer Workflow, Using Mercurial, and Communication with other members of the team. Further information on how we work can be found under Code Style Rules.
IDE Pre-Requirements
Despite the fact that most of the major IDE's support gradle directly, we have decided to provide pre-generated IDE configuration files in order to make using an IDE smooth and painless. As the IDE's support for gradle improves, we may be able to update these instructions to rely on that support instead of the checked-in project files that we have today.
IMPORTANT: Ensure that you do not have gradle plugins for NetBeans or Eclipse installed. They will conflict with the pre-generated IDE files. In furture, we may move to gradle builds within the IDE's as support becomes better.
Get a build of the JDK8 (8u40 or later)
If you are building and running native libraries, you need to make sure you use the same version of JDK for NetBeans that you use to build JavaFX with gradle. In particular, if you try to mix a 32-bit JDK and a 64-bit JDK, the binaries will fail to load.
Get an IDE that supports JDK8
OpenJFX is based on JDK1.8 and IDE support for lambdas and default methods may require that you get a pre-release version of the IDE you choose
NetBeans: https://netbeans.org/downloads/
IntelliJ: http://www.jetbrains.com/idea/download/
Eclipse: http://www.eclipse.org/downloads/index-java8.php
Once you have downloaded and installed an IDE that is JDK8 aware, you will need to configure it to accept JDK8 syntax and generate the right byte codes. This will be explained later on for each particular IDE. If you use an IDE without JDK8 support, such as NetBeans 3.7.1, OpenJFX will not compile and you will not be able to run from within the IDE.
Delete jfxrt.jar (or move it to a different directory)
JavaFX is bundled with the JDK as an extension. The jfxrt.jar is located in the extension directory called 'ext' where Java is installed. You must remove it from this directory for the IDE's to work properly. The issue is this: If jfxrt.jar is in the extension directory, it will get seen before the code in your IDE. This means you won't be running or testing the code in your IDE. For more information on why this is a problem, see Unique Challenges of Working on the JDK.
By moving jfxrt.jar to a standard cache directory, your IDE can reference it to find binary versions of classes that are not yet open source. Further, when both jfxrt.jar and your IDE reference a class, the class from the IDE will be chosen.
IMPORTANT: Do not skip this step. If you do, you will not be running the code in your IDE and will waste hours wondering why you make changes and they don't run.
Using NetBeans
Many commiters are using NetBeans to develop Java and native code. NetBeans projects have been configured for both. Native projects in NetBeans are currently not configured to build using either Make or gradle, however ant build works in NetBeans and will build the classes and jar files needed for the IDE.
Here are the steps to use NetBeans:
- Edit netbeans.conf
- Invoke NetBeans
- Add the JDK8 Platform
- Import NetBeans projects
- Rebuild
- Run sample code
- Run sample code with grade built shared libraries
Edit netbeans.conf
NetBeans needs to be told not to report errors when private JDK classes referenced. The netbeans.conf file is located in the etc directory of your NetBeans install. You will edit netbeans_default_options.
- Change netbeans_default_options to add "-J-DCachingArchiveProvider.disableCtSym=true". You may also wish to increase memory using "-J-Xmx1024m".
Here is a sample file from the Mac. The Windows and Linux default options might be a bit different.
netbeans_default_options="-J-client -J-Xss2m -J-Xms32m -J-XX:PermSize=32m -J-Xmx1024m -J-DCachingArchiveProvider.disableCtSym=true -J-Dnetbeans.logger.console=true -J-Dapple.laf.useScreenMenuBar=true -J-Dapple.awt.graphics.UseQuartz=true -J-Dsun.java2d.noddraw=true -J-Dsun.java2d.dpiaware=true -J-Dsun.zip.disableMemoryMapping=true -J-Dplugin.manager.check.updates=false -J-Dnetbeans.extbrowser.manual_chrome_plugin_install=yes"
Invoke NetBeans
Note that before you invoke NetBeans, you may need to clear your old defaults and start with a fresh NetBeans install or you might get errors.
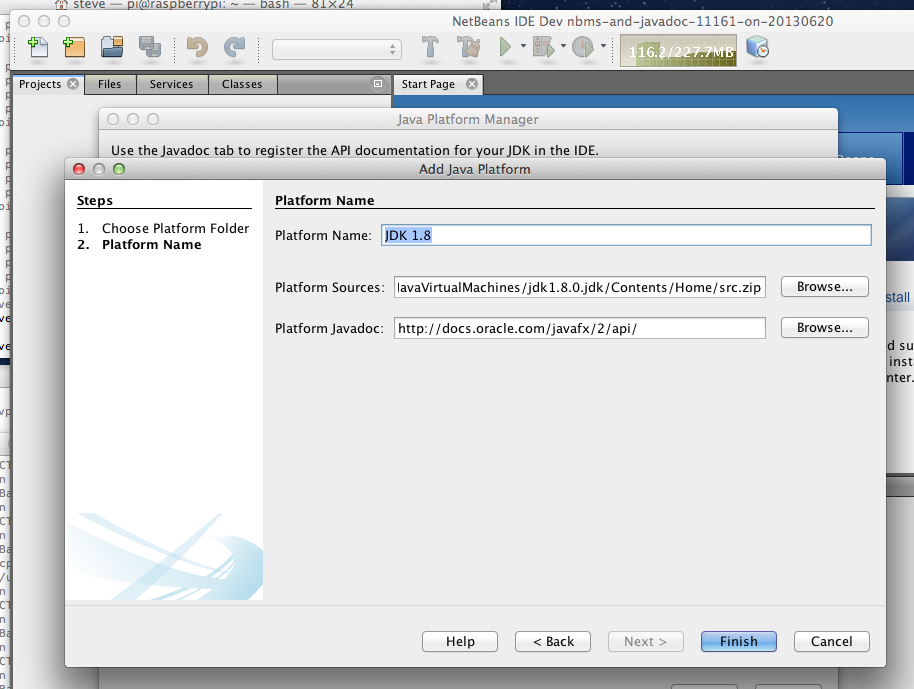
Add the JDK8 Platform
Invoke Tools->Java Platforms
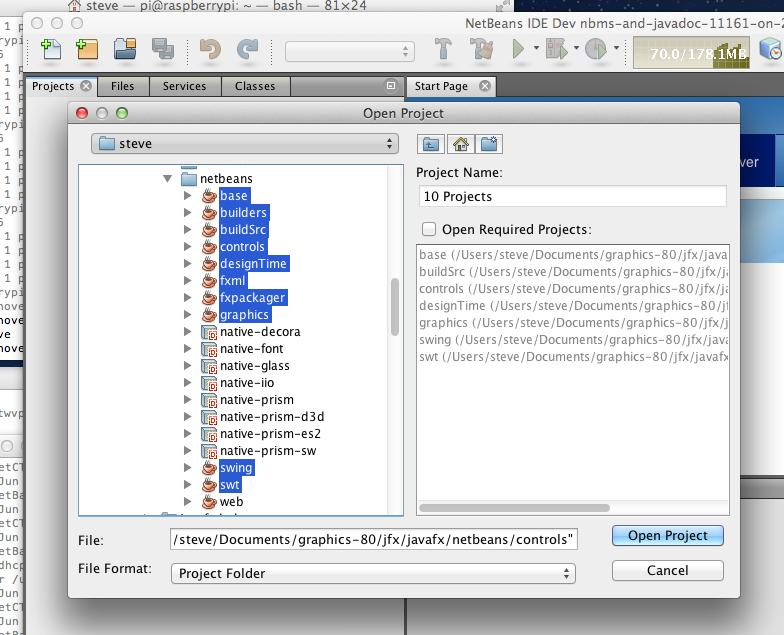
Import the NetBeans Projects
Open Project... (you may need to resolve missing junit jars, don't open web or builders for now)
Rebuild
This might take quite a long time depending on how fast your machine it. There should be no red marks on any of the projects.
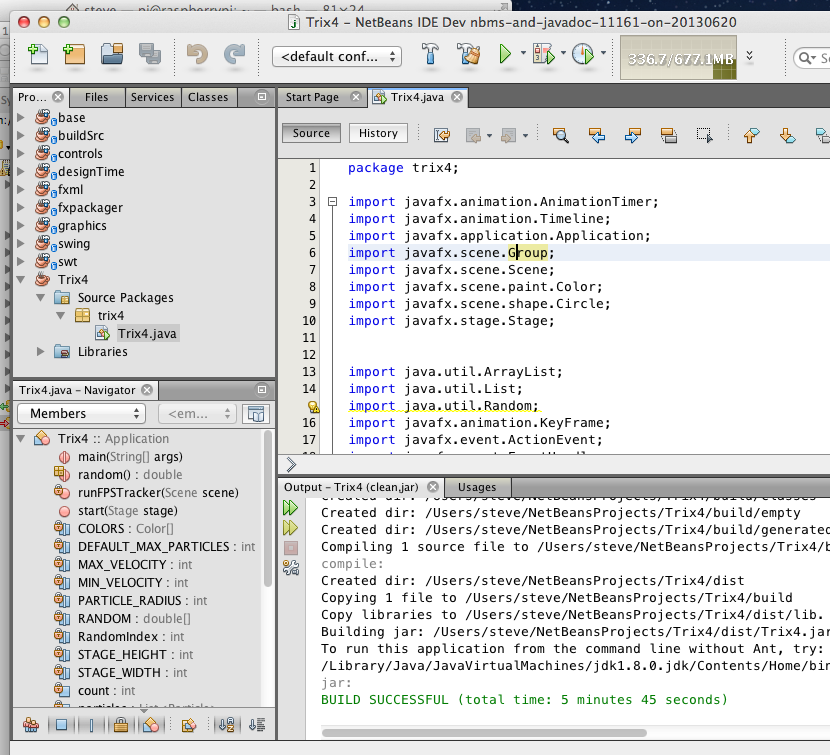
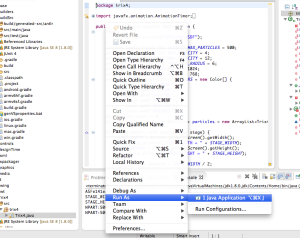
Run Sample Code
Here is some sample code that was hooked up to use the base, graphics and controls projects. When saved, these projects were built by the IDE and the same code executed using the source in the IDE.
Run Sample Code with gradle built shared libraries
//TODO - explain how to hook up the shared libraries in the run dialog
Using IntelliJ IDEA
IntelliJ is a popular IDE that is used by many committers to develop JavaFX code. An IntelliJ project has been created for you that you need to open. The steps to use IntelliJ are:
- Open the IntelliJ Project
- Make
- Run sample code
- Run sample code with grade built shared libraries
Open the IntelliJ Project

IMPORTANT: Open IntelliJ on the 'rt' directory exactly as indicated in the image above.
Make
Build->Make Project

Run Sample Code

Run Sample Code with Gradle Built Shared Libraries
//TODO - explain how to hook up the shared libraries in the run dialog
Using Eclipse
Eclipse is a popular IDE that is used by many committers to develop Java code. Eclipse projects have been created for you to use.
IMPORTANT: The location of the mercurial repository (<PATH TO JFX>) must not be inside the Eclipse workspace directory. If it is, nothing will compile and work.
The steps to use Eclipse are:
- Import the Eclipse Projects
- Configure Eclipse to use JDK8
- Run sample code
- Run sample code with grade built shared libraries
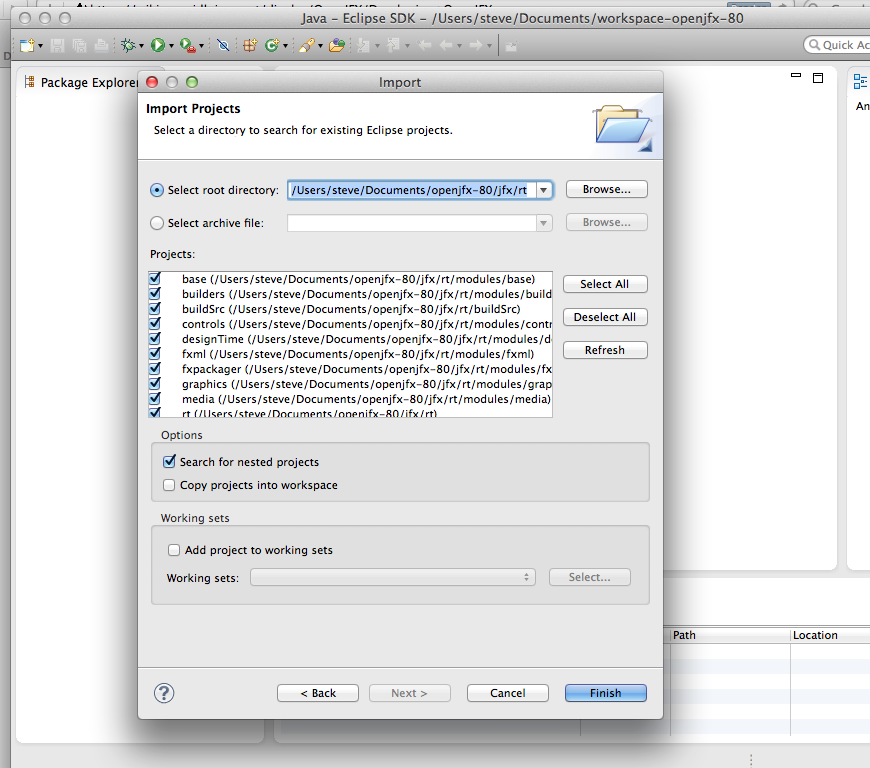
Import the Eclipse Projects
Import->General->Existing Projects into Workspace
Check 'Search for nested projects
Configure Eclipse to use JDK8
Preferences->Java->Compiler->OK

Run Sample Code
Run Sample Code with Gradle Built Shared Libraries
//TODO - explain how to hook up the shared libraries in the run dialog
//TODO - these are the VM Arguments: -Djava.library.path=${workspace_loc:rt}/build/mac-sdk/rt/lib
Overview
Content Tools