- Loading...
Page History
...
The sdk task will build an OpenJFX SDK for your particular Operating System. For example, on a Mac, this will produce build/mac-sdk and on windows build/win-sdk. Multiple different sdks may be built concurrently, and all will reside within the build directory when completed (see <<Cross Builds>> for more information). Gradle automatically handles the downloading of all dependencies (such as Antlr and SWT).
Invoking gradle without any additional parameters will skip the building of all native code. The reason for this default behavior is that most contributors to OpenJFX do not need to build native code for the contribution they are going to give, and most do not have the toolchains installed necessary to build the native code. Also, setting up the native toolchains on Windows is fairly difficult and error prone, and requiring all developers to cross this hurdle before they can contribute to OpenJFX is counter productive.
However, if you would like to build native code (but not GStreamer or WebKit) then you can invoke gradle passing this property:
| Code Block | ||
|---|---|---|
| ||
gradle |
For more information on build properties, see Customizing the Build.
Cross Builds
The build is configured to support cross builds, that is, the ability to build an SDK for a platform other than the one you are building from. There are multiple gradle files located in buildSrc which represent specific compile targets. These include:
- win.gradle
- mac.gradle
- linux.gradle
- android.gradle
- ios.gradle
- armv6sf.gradle
- armv6hf.gradle
Each of these have specific prerequisites that must be met before they can be built. win.gradle can only be used on Windows, mac.gradle on Mac, and linux.gradle on Linux. Android can be cross built from Mac, Windows, or Linux so long as the Android SDK and NDK are installed and the build knows where to find them. iOS can be cross built on Mac. ARM (soft float and hard float) can be cross built from Linux.
By default, the OpenJFX build system will only build the SDK for the desktop platform you are building from. To ask it to build for a specific compile target, you must pass a COMPILE_TARGETS property to the build system, instructing it which to build. This is a comma separated list. Assuming you have already setup the prerequisites for building ARM (for example, when targeting the Raspberry PI), you would invoke gradle like this:
| Code Block | ||||
|---|---|---|---|---|
| ||||
rbair$ gradle -PCOMPILE_TARGETS=armv6hf |
| Anchor | ||||
|---|---|---|---|---|
|
The build can be customized fairly extensively through the use of Gradle properties. Gradle provides many ways to supply properties to the build system. However the most common approach will be to use a gradle.properties file located in the rt directory. Simply make a copy of gradle.properties.template and then edit the resulting gradle.properties file to customize your build.
| Code Block | ||||
|---|---|---|---|---|
| ||||
rbair$ cp gradle.properties.template gradle.properties |
The gradle.properties file that you have just created is heavily documented and contains information on all the different configuration options at your disposal. Some of the most common are:
- Enabling building of native source code (Prism, Glass, GStreamer, WebKit, etc)
- Specifying the build configuration (Release or Debug)
- Enabling building of JavaDoc
- Customizing the JDK_HOME
- Supplying compiler LINT options
Arguably the most important property in the build is the JDK_HOME property. Almost all other properties are derived automatically from this one. The JDK_HOME is by default based on the java.home System property, which is set automatically by the JVM based on which version of Java is executed. Typically, then, the version of Java you will be using to compile with will be the version of Java you have setup on your path. You can of course specify the JDK_HOME yourself. Note also that on Windows, the version of the JDK you have set as JDK_HOME will determine whether you build 32 or 64 bit binaries.
Testing
The next basic task which you may want to perform is test. The test task will execute the unit tests. You generally will execute the top level test because unlike with Ant, Gradle will only re-execute those tests which have changed (or were dependent on code that was changed) on subsequent runs. You can of course execute gradle cleanTest in order to clean all the test results so they will run fresh. Or, if you want to execute only those tests related to a single project, you can do so in the normal fashion:
| Code Block | ||||
|---|---|---|---|---|
| ||||
rbair$ gradle :base:test The CompileOptions.useAnt property has been deprecated and is scheduled to be removed in Gradle 2.0. There is no replacement for this property. :base:processVersion UP-TO-DATE :build-tools:generateGrammarSource UP-TO-DATE :build-tools:compileJava UP-TO-DATE :build-tools:processResources UP-TO-DATE :build-tools:classes UP-TO-DATE :build-tools:jar UP-TO-DATE :base:compileJava UP-TO-DATE :base:processResources UP-TO-DATE :base:classes UP-TO-DATE :base:compileTestJava UP-TO-DATE :base:processTestResources UP-TO-DATE :base:testClasses UP-TO-DATE > Building > :base:test > 3411 tests completed, 45 skipped |
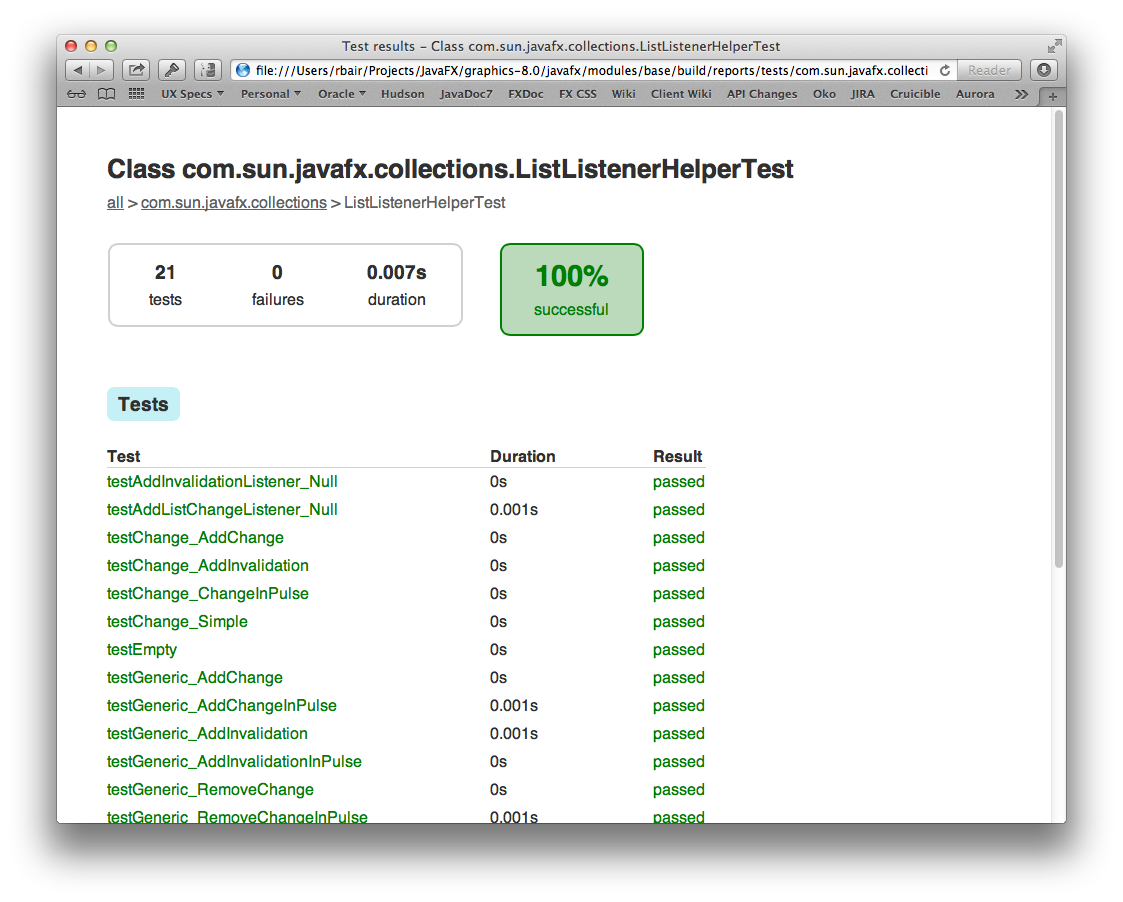
Gradle gives helpful output during execution of the number of tests completed and the number skipped without dumping out lots of output to the console (unless you opt for --info). Also, once the tests complete, an HTML report is dumped to the project's build/reports/test directory (for example, modules/base/build/reports/test):
For the sake of performance, most of the tests are configured to run in the same VM. However some tests by design cannot be run in the same VM, and others cannot yet run in the same VM due to bugs or issues in the test. In order to improve the quality of the project we need to run as many tests as possible in the same VM. The more tests we can run on pre-integration the less likely we are to see failures leak into master. Being able to run 20,000 tests in a minute is extremely useful, but not possible, unless they run in the same VM. Something to keep in mind.
